
In this article, we want to talk about one of the main lifts in weighted calisthenics. The weighted dip is considered a push exercise with the front delts, triceps, and chest working as the prime movers. Next to prime movers, several other muscles are working during the dip. For example, the rotator cuff muscles are responsible for keeping the shoulder joint in a stable position. The serratus anterior and lower traps are supporting shoulder protraction and depression. To maximize your potential and minimize your injury risk with this lift, It is important to have a closer look at the proper technique
To guide you towards the perfect technique, we divided the movement into 5 different phases:
1. The Entrance / Support Hold
Let's start with the right setup. To get into a stable support hold, which is the starting position of a dip we will discuss in a minute, we need a safe and stable entrance. It is recommended to enter from a height that allows you to get into the starting position with your arms straight and your shoulders already depressed (pushed away from the ears). While getting in position, make sure that the weight on the belt is centered under you and not swinging anymore.

When you left the box/entrance surface make sure to get your whole body under tension. It is recommended to get into a so-called hollow body position. This means you engage your abdominal muscles, slightly squeeze the glutes, and rotate your hips into a posterior pelvic tilt (PPT). Your shoulders are depressed and protracted (shoulders moving forward).
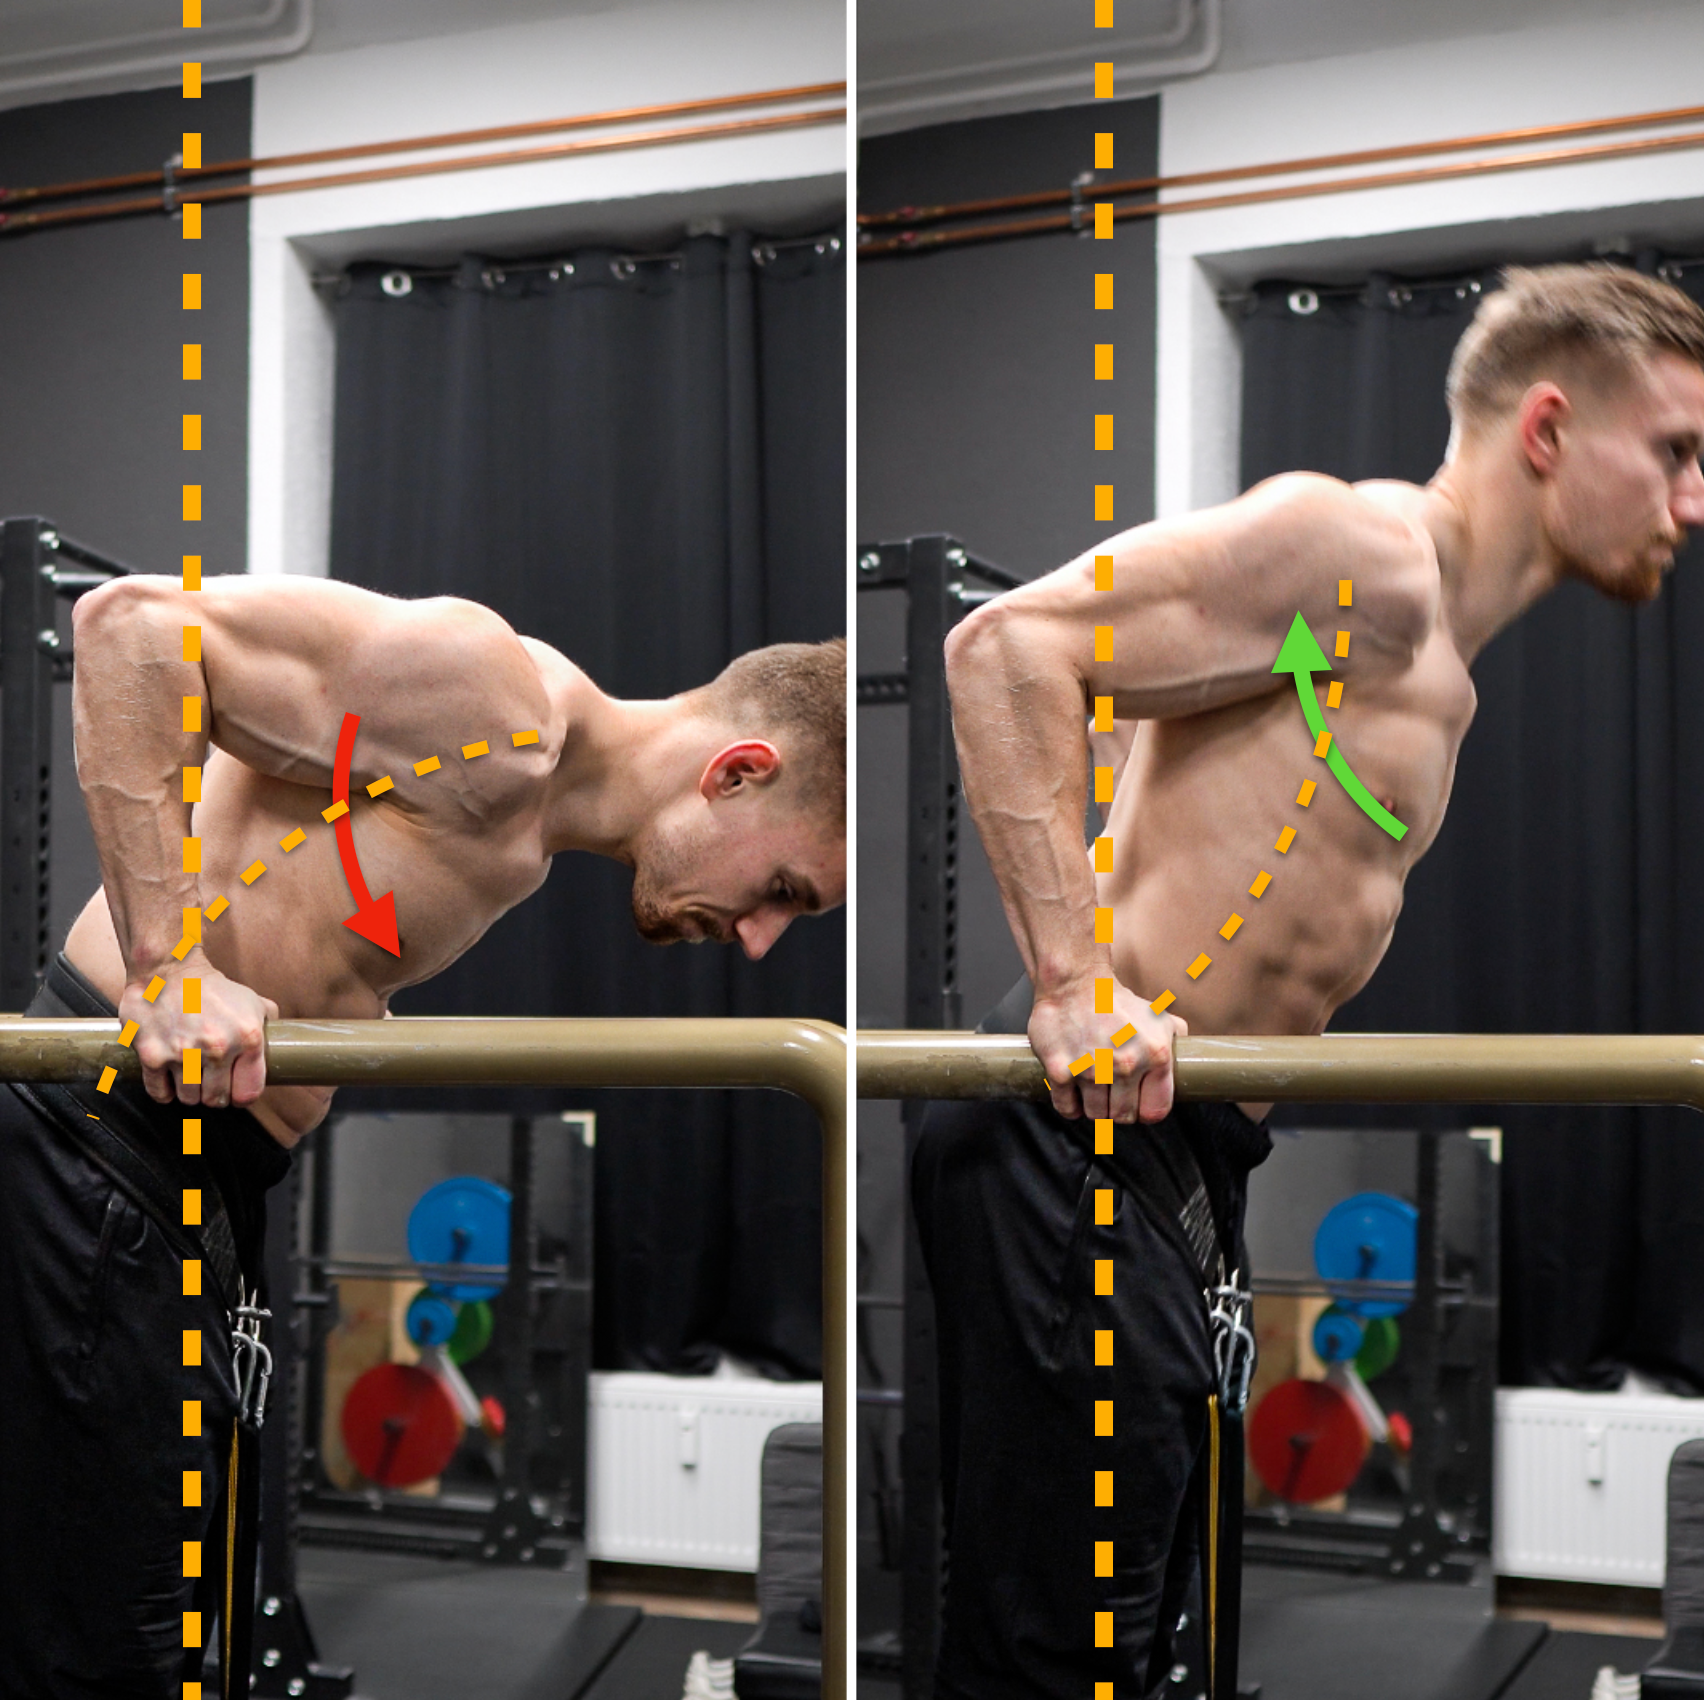
2. The Negative
To understand how to execute the negative how it is written here, we need to get a bit more understanding of the shoulder mechanics first. With a fixed scapular, the shoulder extension, so the range of motion of your arm moving backward, is limited to around 40-60°. We want to keep the scapular fixed for mainly two reasons. The first is, that it creates stability. The second is that it limits the range of motion in the shoulder joint. This results in less stretch and stress on the passive structures around the shoulder joint.
The required depth of a dip in a competition is that the top of your anterior shoulder needs to be below the top of your elbow. If we limit the range of motion now to 40-60° in the shoulder, it is not possible to achieve the required depth for a competition. Therefore, instead of going down vertically with the shoulder, the movement is initiated downward and forward at the same time. While the elbow bends and we lean forward and downward, the limited shoulder extension is compensated with a spine flexion, so a rounding of your spine. Do you remember the hollow body position? This now comes in pretty handy. You just bend at the spine a bit more on the way down and the required depth can be achieved. Be careful though, that you don't overdo this and your hip still travels down, otherwise this is counted as an invalid rep.

With this technique of the negative, we are dipping in the most effective and also in the most sustainable way possible. We are using just as much range of motion as we need to get a valid rep that maximizes the additional weight we can use. Also, our shoulder is stabilized the whole time and not loaded with high weights in its end range. The chest stretch is also limited. This reduces the risk of shoulder capsule pain, sternum pain & several shoulder impingement variations.
3. The Return
If you did a good job, your shoulders and hips are now in sufficient depth. Your shoulders are still stabilized in depression and protraction. The weight should be directly below you and in rest and not swinging. To achieve this, you need to focus on letting the weight move only on a vertical path during the negative which results from the correct timing of bending at the spine, shoulder extension, and elbow flexion. If you have all this set, your return gives you the perfect prerequisites for the positive part of the dip.
4. The Positive
This part of the dip aims to get as efficient as possible back into the starting position. On the way down, we flexed our spine and kept the shoulders protracted. On the way up, after the return, we do now exactly the opposite. You are pushing your sternum up again and extending your spine at the same time while you extend your arms. Bringing up the sternum will also result in a slight shoulder retraction. This gives your chest more length and so more force potential to push. Aligning yourself quickly back to a vertical position reduced the loading arms the additional weight has to pull you down. This allows you to move more weight.

5. Re-Organization
We are now again in the vertical position, but not in the support hold position that we need to initiate a proper negative again. We need to bring our body again into a hollow body position. So we are engaging the abs again, bringing our hips into a PPT and depressing and protracting our shoulders. Now you are ready for the second rep.
If you follow this weighted dip technique, I can guarantee you that you will improve your performance and reduce your injury risk. If you need help with learning and understanding this technique and its biomechanics let us help you with this. Just schedule your free consulting call for our King Of Weighted Online Coaching service.